Introduction
Welcome to the BK7084-Computational Simulation. This is a tutorial to help you setup the Python programming environment so that you can jump right into the practical courses.
Coding Environment Setup
Install a Python interpreter
To run a Python program, you need something called an interpreter. This is a piece of software that runs each command in your code. Python is pre-installed on macOS and Linux, while Windows users must manually install it. You can have multiple installations of Python on the same machine, just like you can have different versions of Microsoft Office or Adobe Photoshop. To manage all these installations and make sure we use the right one, we’ll use the Python environment manager Anaconda to install Python.
Install mini-anaconda
Installation files for Windows, macOS and Linux can be found at: https://docs.anaconda.com/miniconda/
Install Visual Studio Code and the Python Extension
Visual Studio Code
Go to https://code.visualstudio.com/Download and download the corresponding installer for your system.

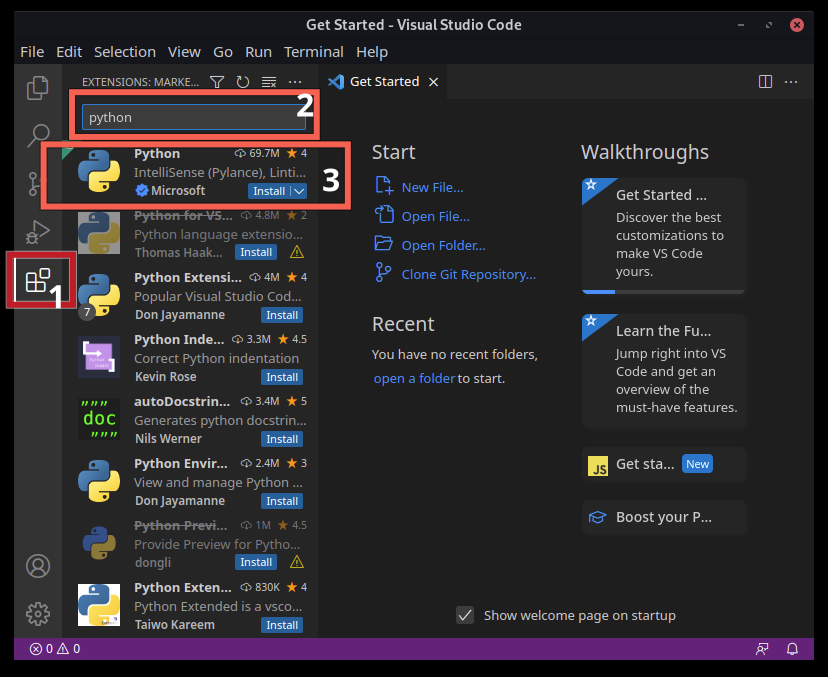
Once the Visual Studio Code editor is installed, install the Python extension. Open your Visual Studio Code, and search python in Extensions tab.
Start VS Code in a project folder
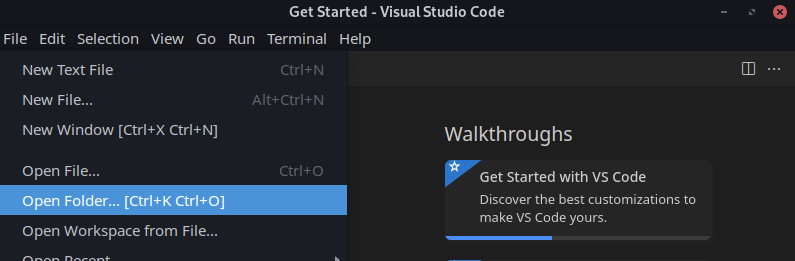
Create an empty folder called hello, and open the folder from VS Code: Menu > File > Open Folder…
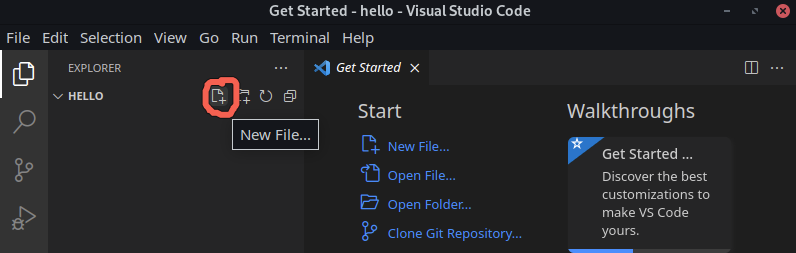
From the File Explorer toolbar, select the New File button on the
hello folder:
Name the file hello.py, and it automatically opens in the editor:
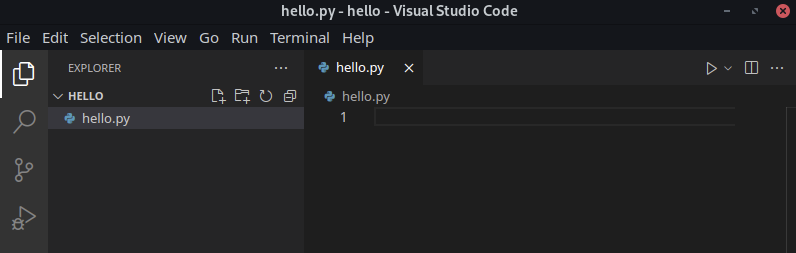
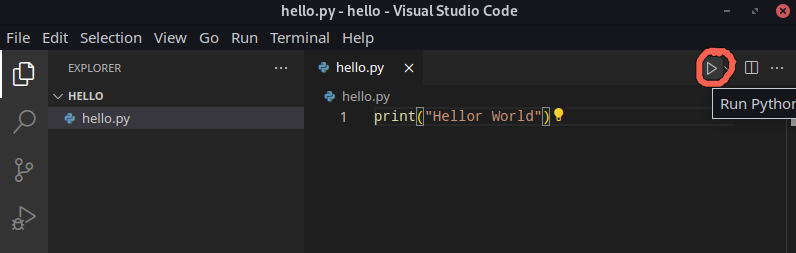
Enter the following source code in hello.py:
print("Hello World")
Conda environment
Using the terminal, create a new environment with Python 3.9 installed.
You don’t have to type the $. It’s used to show that you should run a line in the terminal.
$ conda create -n compsim python=3.9
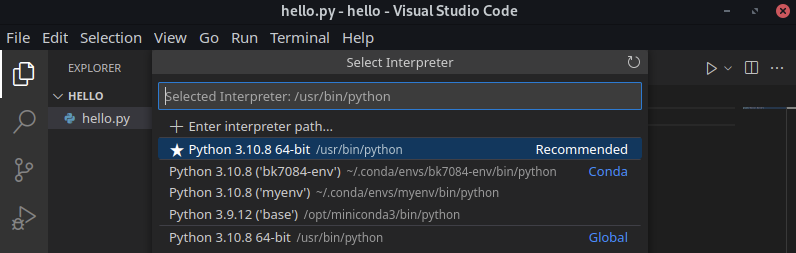
Before we run it, we need to select a Python interpreter: within VSCode, open the Command Palette (Ctrl+Shift+P), and then type Python: Select Interpreter command to search, then select the command. The command presents a list of available interpreters that VS Code can find automatically, you should be able to see compsim, the environment we just created. Click to choose it. If you don’t see the name compsim run the command|:
$ conda activate compsim
You will need to run this command every time you open VSCode.
Now you can run the script by simply clicking the Run Python File in Terminal play button in the top-right side of the editor.
The button opens the terminal panel in which your Python interpreter is
automatically activated, then runs python hello.py.
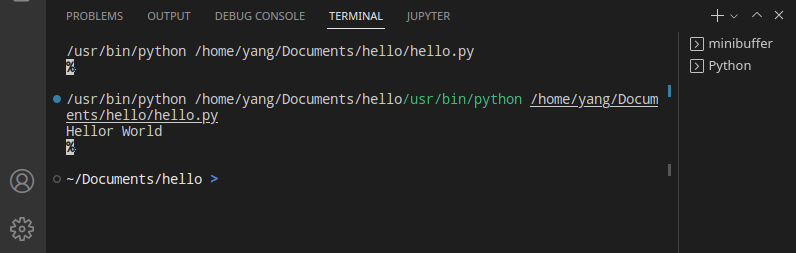
As you can see, the Hello World is successfully printed on the screen in the terminal.
Assignments Setup
To get your assignments, click the Download assignments button at the top of the page or go to https://github.com/bk7084/assignments, click Code then Download ZIP.

Extract the zip file to your preferred location. Open the folder 00_introduction in VS Code, then open the file intro.py. You can try to run the file by clicking the Run Python File on top-right. Your terminal probably gives the following error: ModuleNotFoundError: No module named ’bk7084’
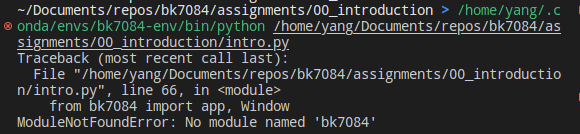
So, what exactly is a Python module? Simply put, a module is a Python file that contains definitions of functions, classes, and variables. In our case, it means that we need to install this module or package named bk7084.
If you have not done so yet, activate compsim using
conda activate compsim
type the following command to install the missing bk7084 module
pip install bk7084
pip is the standard package manager for Python. It allows you to install and manage additional packages that are not part of the Python standard library.
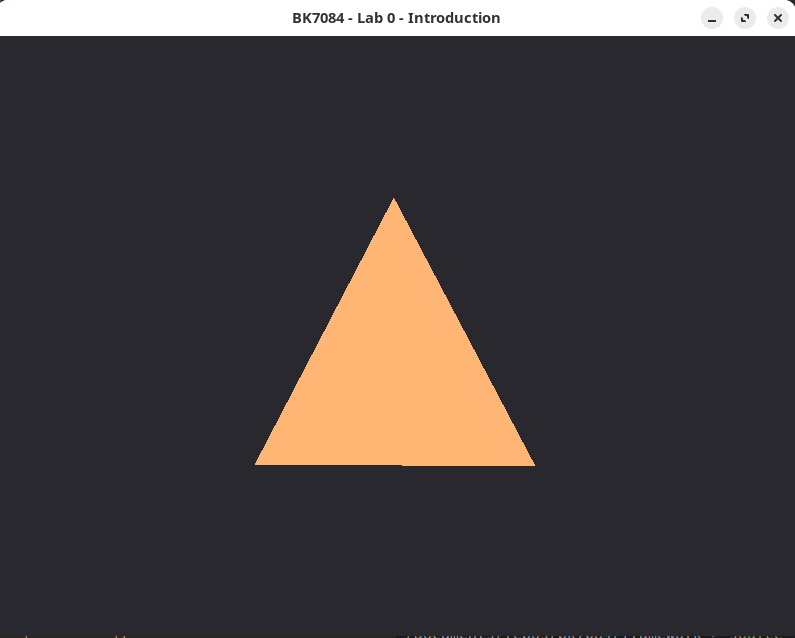
Once the installation is finished, try again to run the intro.py, you should have a window with a brownish triangle drawn above like this:
Congratulations! You now have a Python environment with the necessary packages to run all the exercises. Now go ahead and try the exercises inside intro.py.